The Scheduling tab opens on today. This is the screen the front desk lives in, so it's worth knowing properly rather than by trial and error.
Three ways to look at the day
Along the top of the schedule are three view buttons:
- By time — every provider's visits for the day, in time order. The default, and the right one for "who is in the building".
- By provider — one provider's day. Use it when a clinician asks what their afternoon looks like.
- By location — one clinic location's day. Use it when you cover more than one site.
Picking provider or location reveals a dropdown to choose which. Watch the count on the right: it reads something like 9 visits · all providers, and the · all providers disappears the moment you filter.
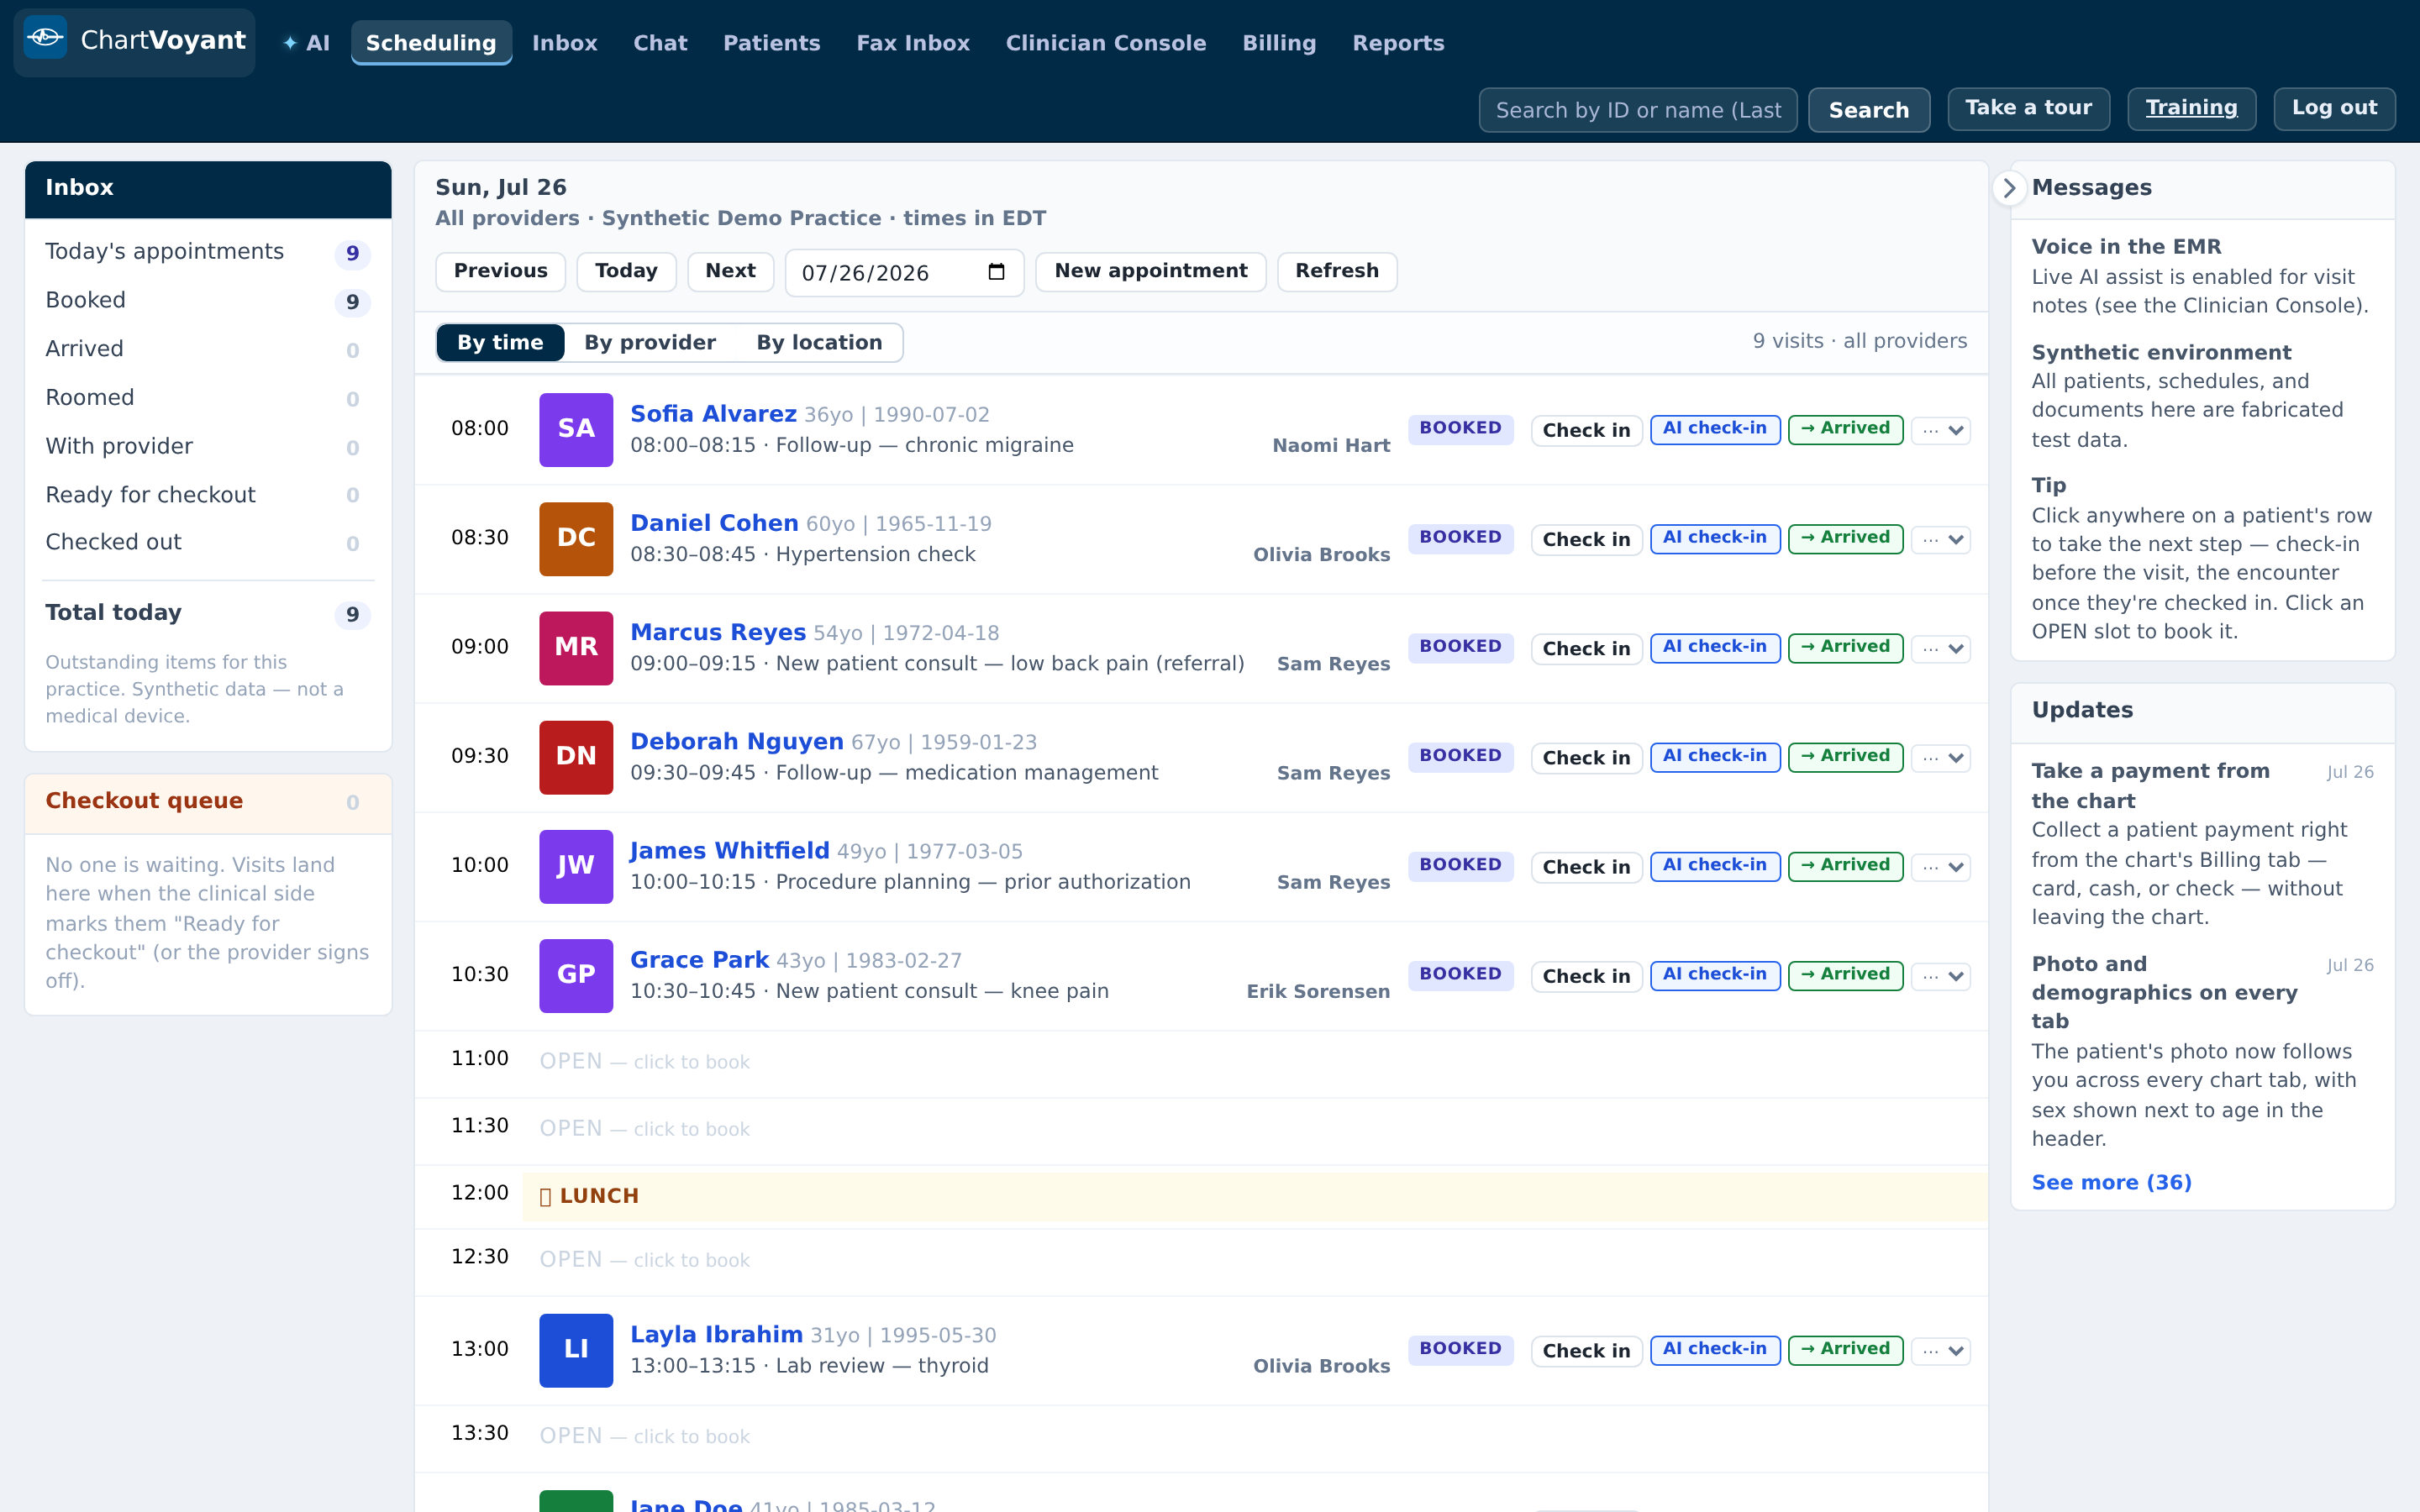
The header controls, left to right: Previous, Today, Next, a date picker, New appointment, and Refresh.
Today is the one you'll use most — it's easy to navigate three weeks out and forget.
If the practice is closed on the day you're looking at, New appointment is disabled and its tooltip tells you why and where to change it: Closed — … Change it in Admin → Holidays & closures.
Reading the statuses
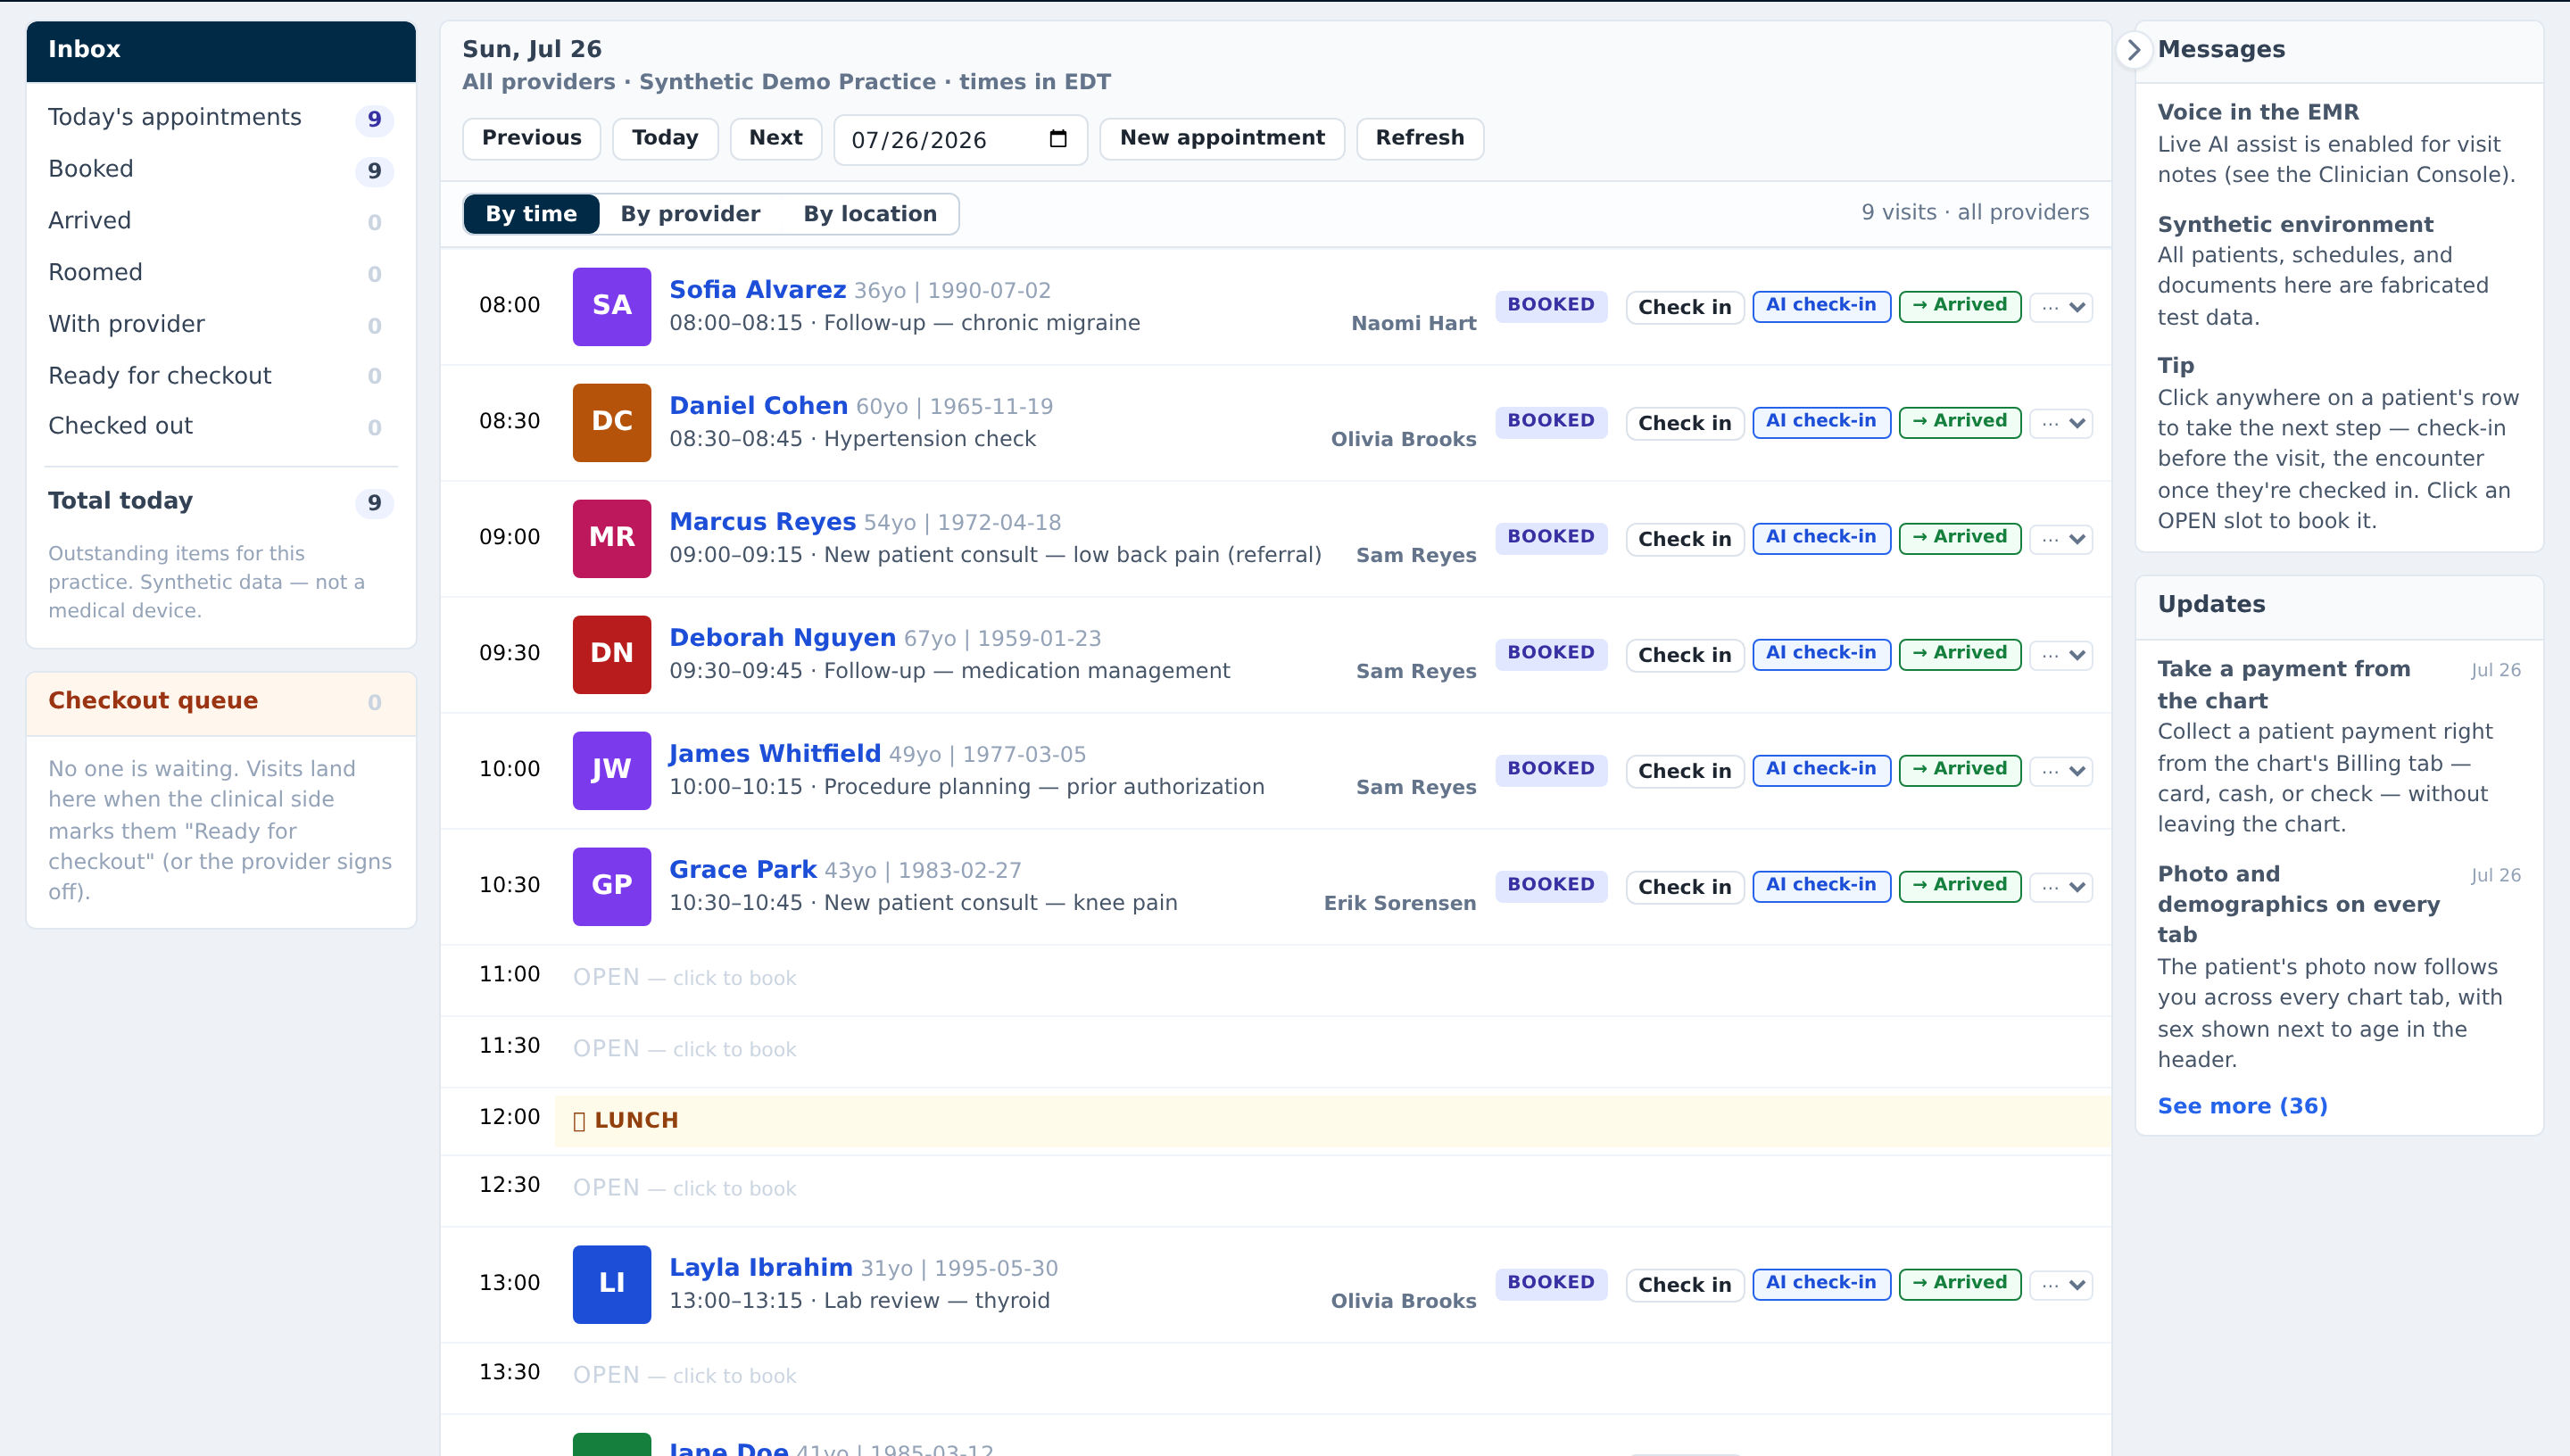
Each visit carries a status chip. In the order a visit normally travels:
| Chip | Means |
|---|---|
| BOOKED | On the books, not arrived |
| CHECKED-IN / ARRIVED | In the building |
| ROOMED / IN ROOM | In an exam room |
| WITH STAFF | With an MA or nurse |
| READY FOR PROVIDER | Intake done, waiting on the clinician |
| WITH PROVIDER / WITH CLINICIAN | In with the clinician |
| READY FOR CHECKOUT | Clinician done — the desk's turn |
| CHECKED OUT / DONE | Finished |
| CANCELLED / NO-SHOW | Didn't happen, with a reason on the record |
Two of these matter most to you: BOOKED means "check them in", and READY FOR CHECKOUT means "collect and book the follow-up".
Moving a patient along
Each row carries the buttons that make sense for where the visit is:
- Check in on a booked visit
- AI check-in — the conversational self-check-in, run from the desk
- Encounter — opens the clinical view for the visit
- An advance button that names the next step, like → Arrived or → Ready for checkout
- A narrow ⋯ dropdown to set any status directly, for when reality didn't follow the order
Clicking anywhere on the row does the sensible next thing, and the row tooltip tells you what that is before you click.

The left column
Down the left is a running count of the day: Today's appointments, Booked, Arrived, Roomed, With provider, Ready for checkout, Checked out, and Total today. It's the fastest read on whether the morning is on schedule.
Under it sits the Checkout queue — everyone waiting to be checked out, with how long they've been waiting. When it's empty it tells you why: No one is waiting. Visits land here when the clinical side marks them "Ready for checkout" (or the provider signs off).
Things on the schedule that aren't visits
CLOSED with a reason — a practice-wide or location closure. Existing appointments still show; new ones are blocked.
Frozen — Entire Day — one provider unavailable all day, with a reason. Other providers are unaffected.
FROZEN on a single slot — an administrator has blocked that window.
🍽 LUNCH — the lunch break from practice settings.
Off hours — outside that provider's working hours.
Each of these tells you where it's configured, which saves a round trip: closures live in Admin → Holidays & closures, lunch in Admin → Practice settings, provider hours in Admin → Scheduling.
What usually goes wrong
Forgetting you're filtered. Half the day appears to vanish. Check the count line and the view buttons.
Using ⋯ instead of the advance button. It works, but skipping statuses means the timing data — how long people actually waited — stops being true.
Trying to book on a closed day and assuming it's broken. Read the tooltip; it names the closure and where to change it.
Leaving people in READY FOR CHECKOUT. The clinician is done and the room isn't freed until check-out completes. Watch the Checkout queue's waiting minutes.