Most patients will self-check-in. This lesson is the other path: the patient at your counter who needs you to do it, and the parts of check-in that only happen at the desk.
Getting there
Click Check in on a booked visit, or click the row. The header reads Check-in · [patient name] with the visit type underneath, and ← Back to schedule on the right.
Three buttons across the top decide how you fill it in:
- Run virtual MA — the AI drafts intake from what's known
- Enter manually (no AI) — the form
- HPI & ROS — the pain questionnaire
Next to them, a chip tells you whether live AI is available, and the fixed caveat: Draft-only — a human MA confirms before the clinician.
Consent comes first
The Consent capture section holds four checkboxes:
- Consent to treat — required
- Financial responsibility acknowledged — required
- Consent to recording & AI processing of the visit conversation — required
- Telehealth consent (if video visit) — optional
Tick the required ones and press Capture consent. You'll get Consent captured — the encounter will unlock automatically.

Once captured, the section collapses to ✓ captured with a timestamp and an Update consents button.
The intake checklist
Press Run virtual MA first — the checklist is the AI's draft, so it only appears once there is a draft to check. While it works the button reads Virtual MA working…
Then you get the Intake checklist, with the hint Click a row to resolve. Each row shows a label, a status of complete, needs-review or missing, and a blue Resolve →.
For a self-pay patient the insurance rows disappear, with a note: Self-pay — insurance & eligibility items hidden.
+ Add item creates a row for anything the practice needs on this particular patient.
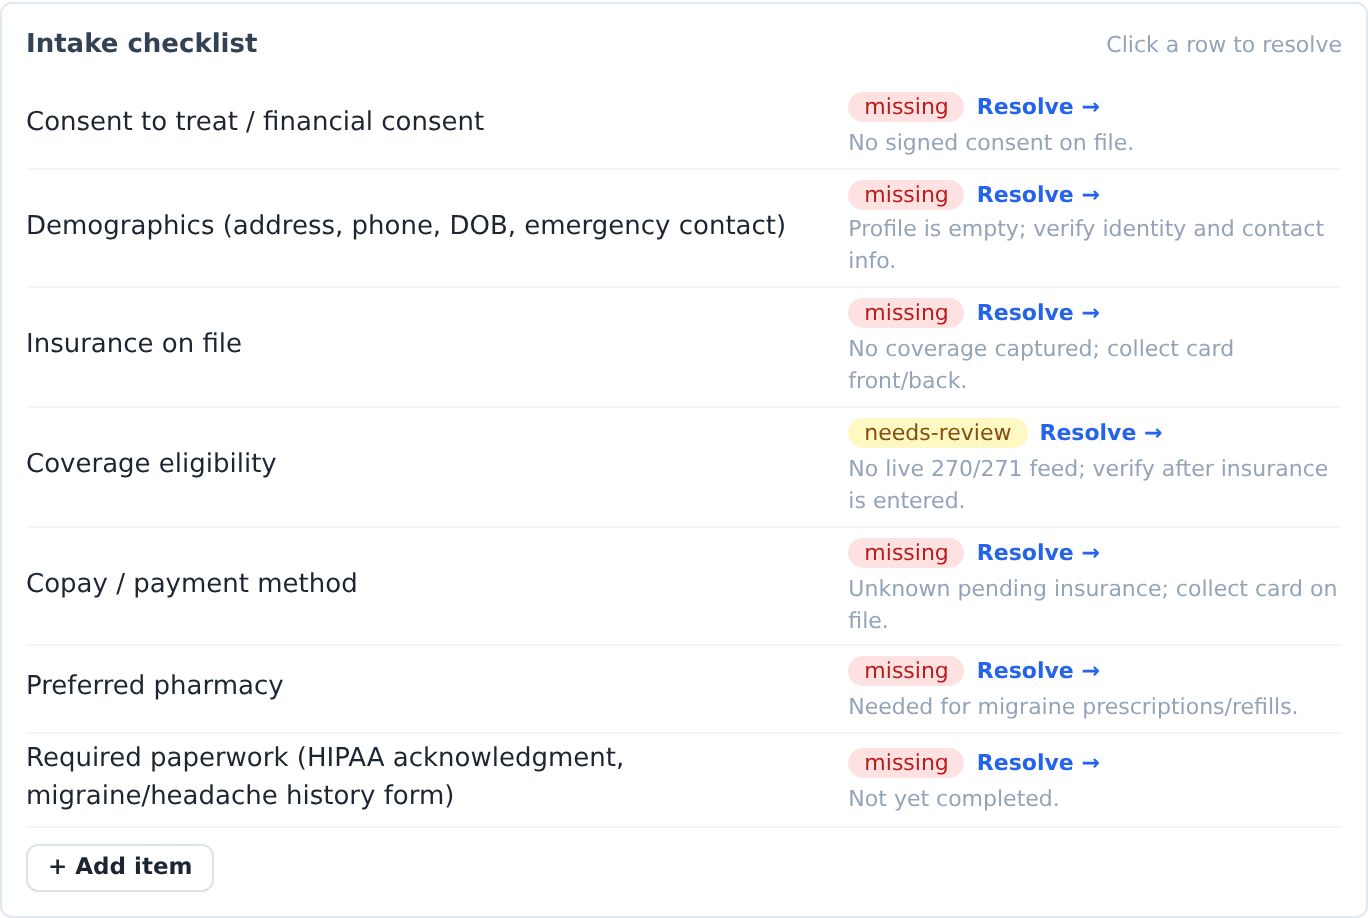
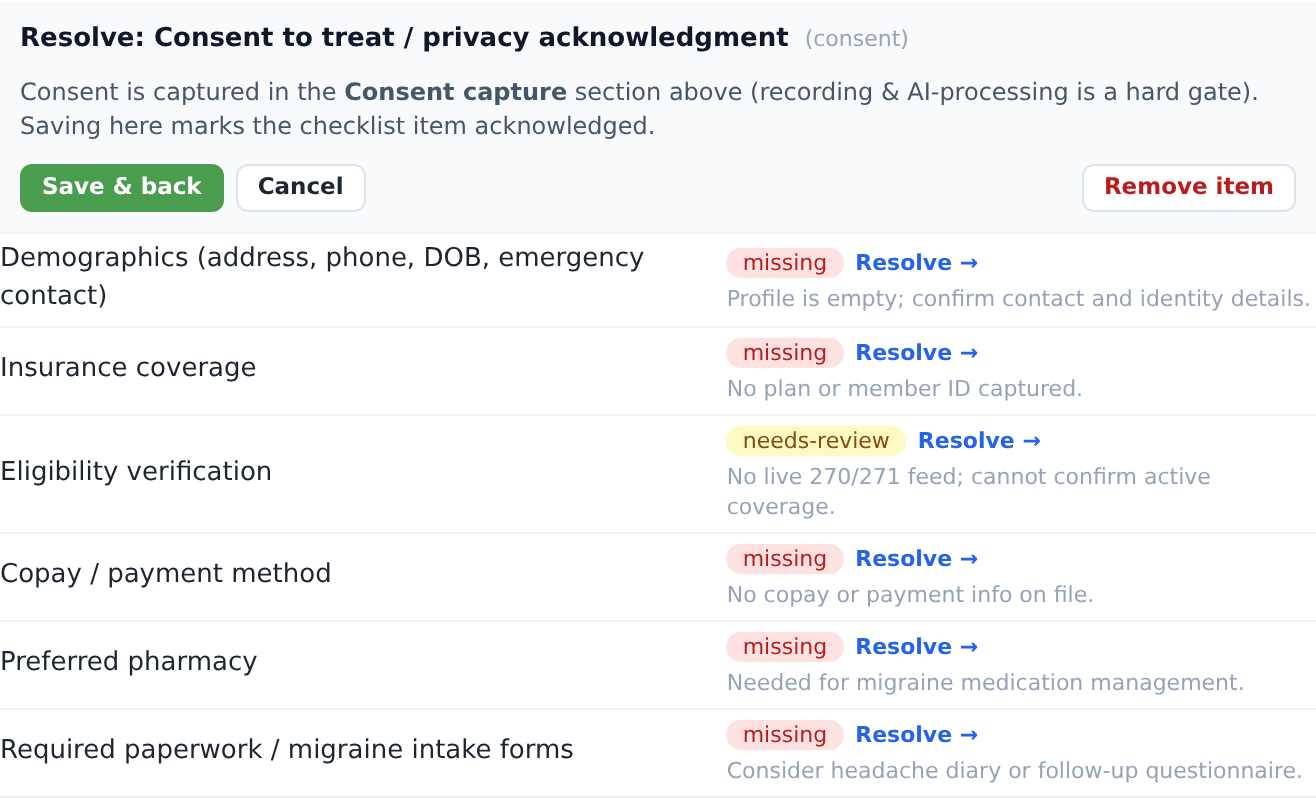
Click a row and it opens in place — Resolve: [label] — with the fields that item needs. The resolver adapts to what the row is about:
- Insurance or eligibility → insurance name and member ID, plus Check eligibility
- Payment → Insurance or Self-pay
- Pharmacy → the pharmacy picker
- Demographics → phone, date of birth, address, emergency contact
- Paperwork → Notice of Privacy Practices, financial responsibility, authorization to treat
- Anything else → label, status and a note
Press Save & back. The row's status updates and you move on.
Doing it by hand
Enter manually (no AI) opens Manual intake — for patients who can't use the AI:
Full name · Date of birth · Phone · Email · Insurance (primary) · Insurance member ID · Preferred pharmacy · Reason for visit
Press Save to profile. Its own footnote is the right instruction: Leave anything you're unsure of blank — staff can help finish it. A partly-filled record beats a wrong one.
Confirm check-in appears under the form once you've saved, so the manual path never needs the AI to have run at all.

If a patient started at the kiosk and gave up, they'll have tapped Switch to front desk — and what they already typed comes with them. You'll see Pre-filled 5 field(s) from the AI check-in. Check those fields rather than assuming they're right; they came from a patient on a phone.
Copay, questions, and finishing
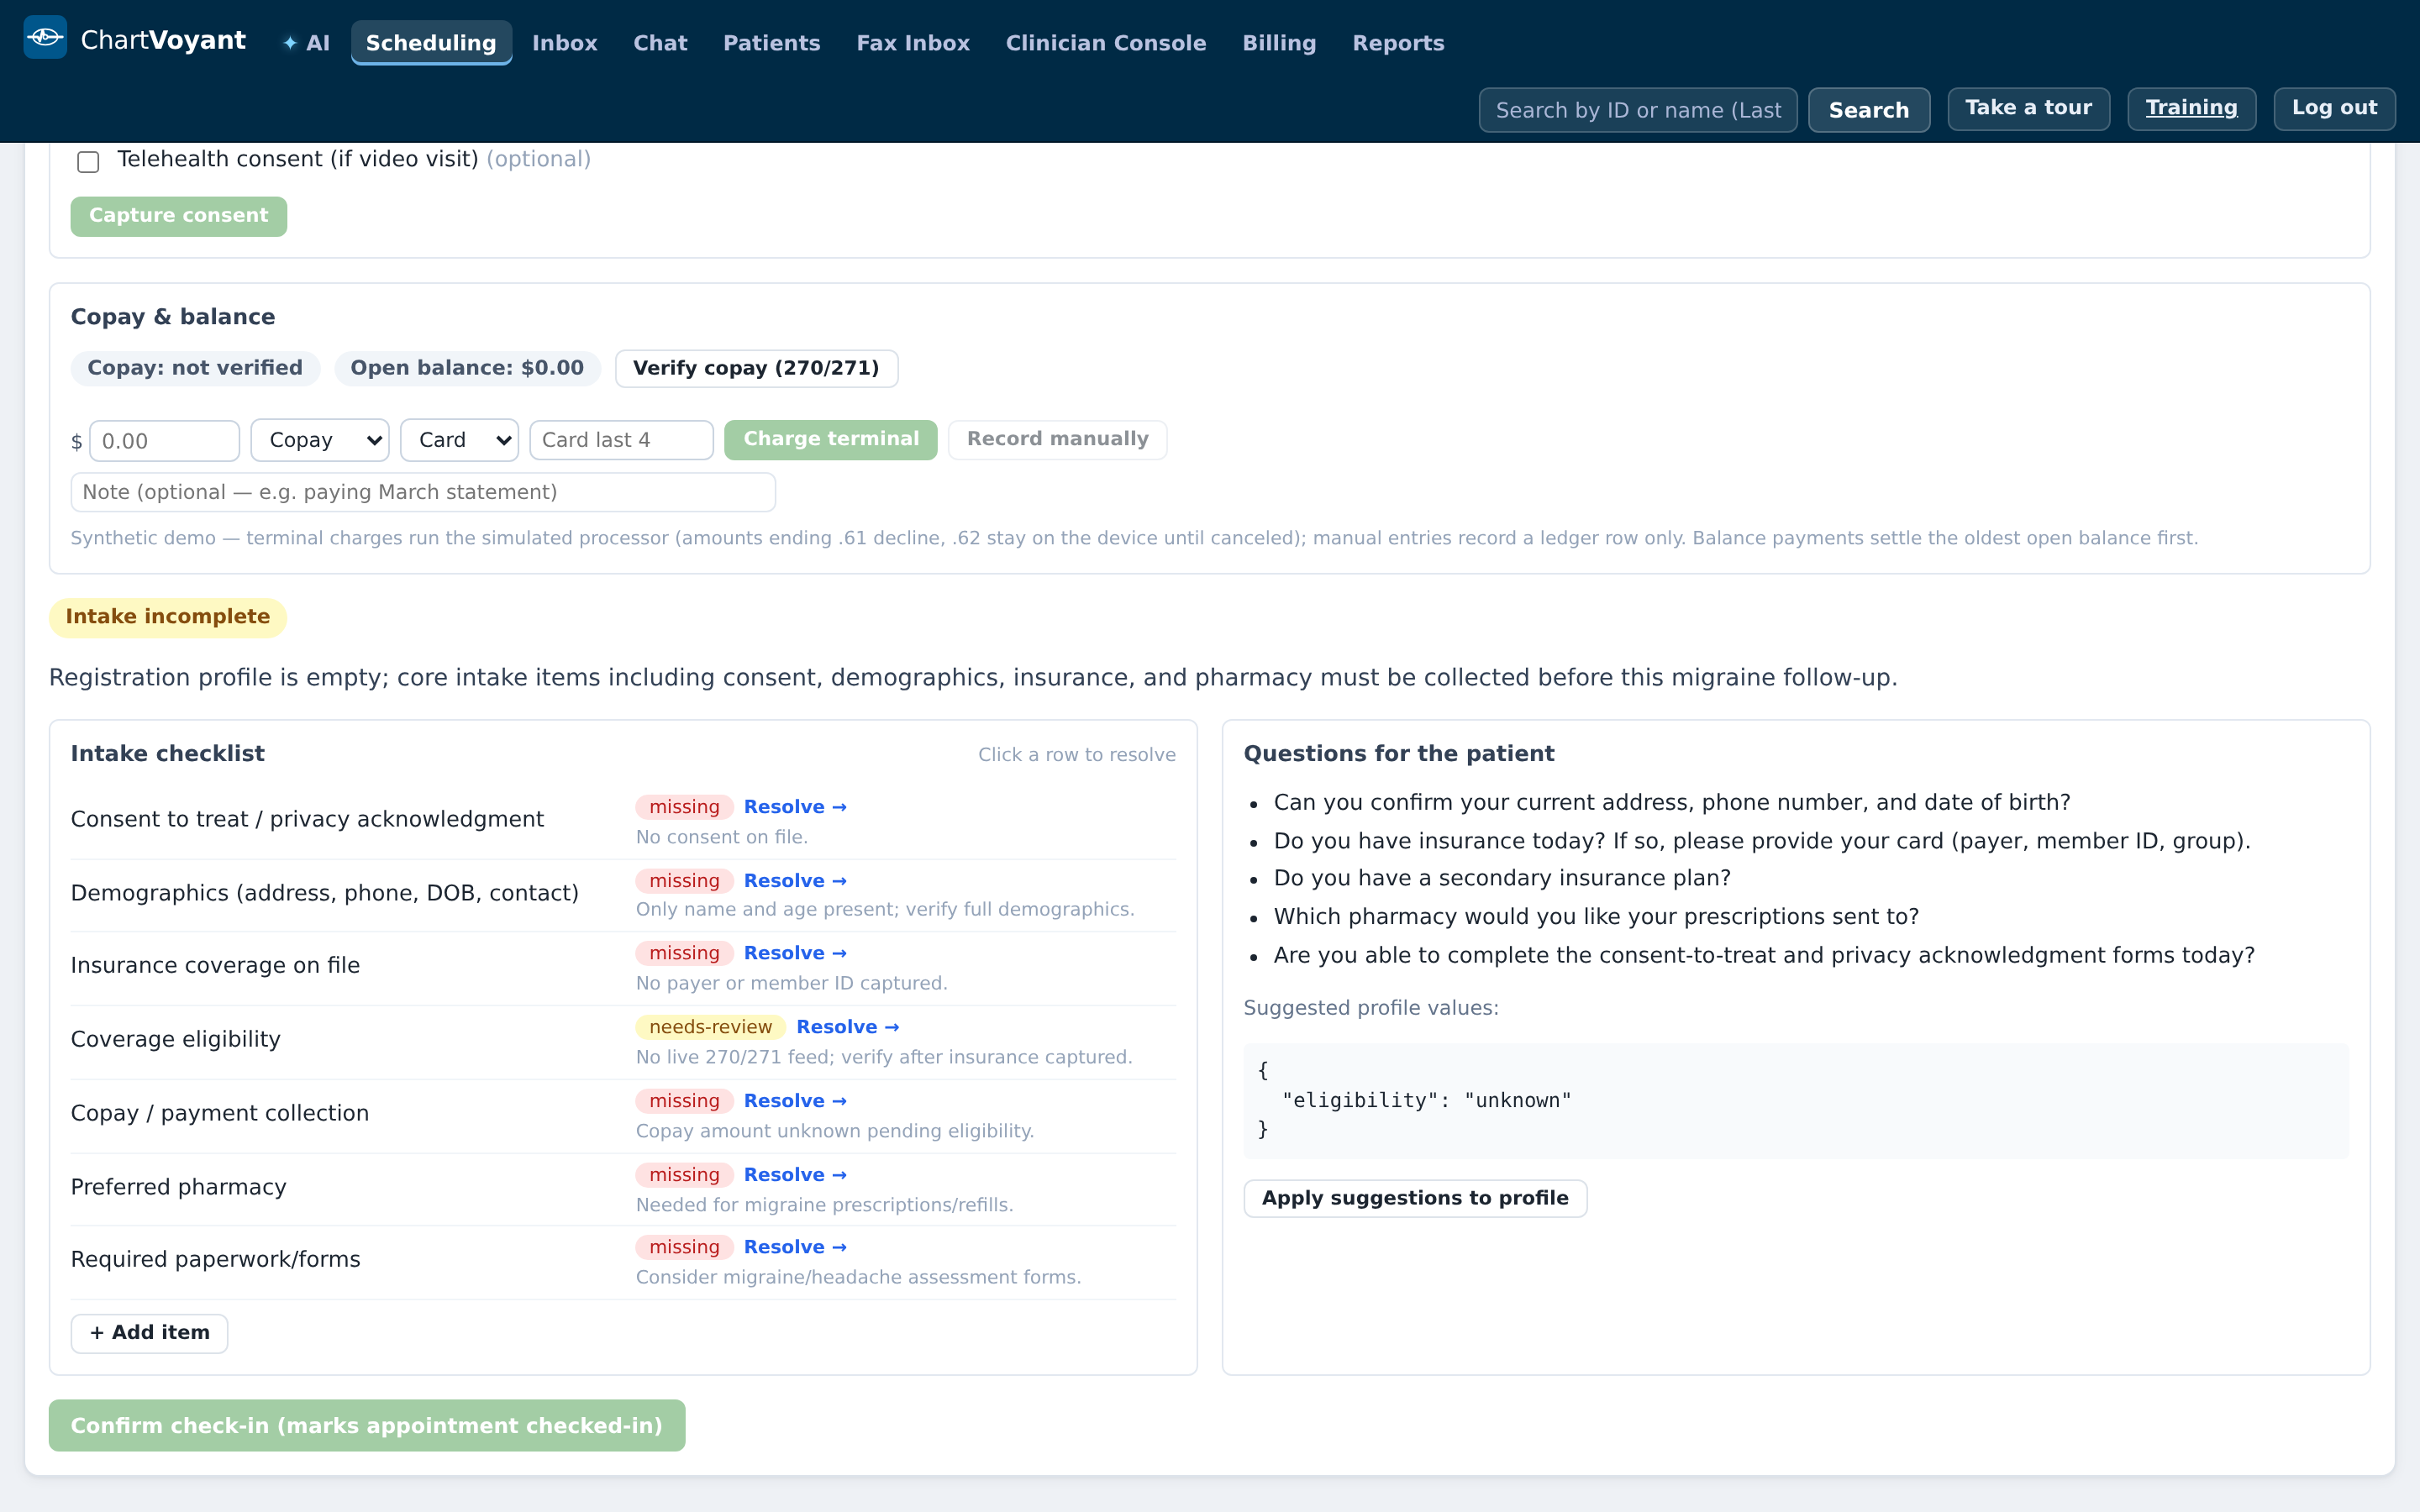
Copay & balance sits in the middle of the page — that's the payments panel, covered in its own lesson.
Questions for the patient collects things worth asking, with Apply suggestions to profile to accept the suggested values in one go.
A chip near the bottom reads Ready for clinician ✓ or Intake incomplete.
Finally: Confirm check-in (marks appointment checked-in).
If items are still missing, the button is disabled with the tooltip Resolve missing items first (or enter them manually). When it works you get Patient checked in. and the schedule updates.
What usually goes wrong
Doing all the intake and forgetting to confirm. The visit still reads BOOKED and the clinical side thinks the patient hasn't arrived.
Treating the synthetic eligibility result as a real coverage check. It says (synthetic) on the result. Believing it is how a patient gets billed for a plan they don't have.
Capturing consent by ticking everything without asking. These are legal attestations, especially recording consent. Ask the question out loud.
Retyping what the kiosk already captured. Check the Self check-ins (kiosk) panel first — the answers may already be waiting for review.